

Mittens for a lady
When I unlocked my bike this morning at a quarter past six, my fingers were already tingling from the cold. I, quickly, put on my mittens and I rushed down the street to warm up. There’s no denying it anymore, it’s wintertime. And what would you do without a pair of warm mittens?
At First, it might seem a bit too tricky to knit a pair of mittens But once you’ve tried it, you know it isn’t hard at all. The only thing that isn’t straightforward, is the thumb. But for the knitter with a little bit experience, it’s no big deal. I have to admit, I’ve never gotten the nerve to try a pair of gloves. I hope I will soon, but I’m wondering if all the fingers will turn out right…
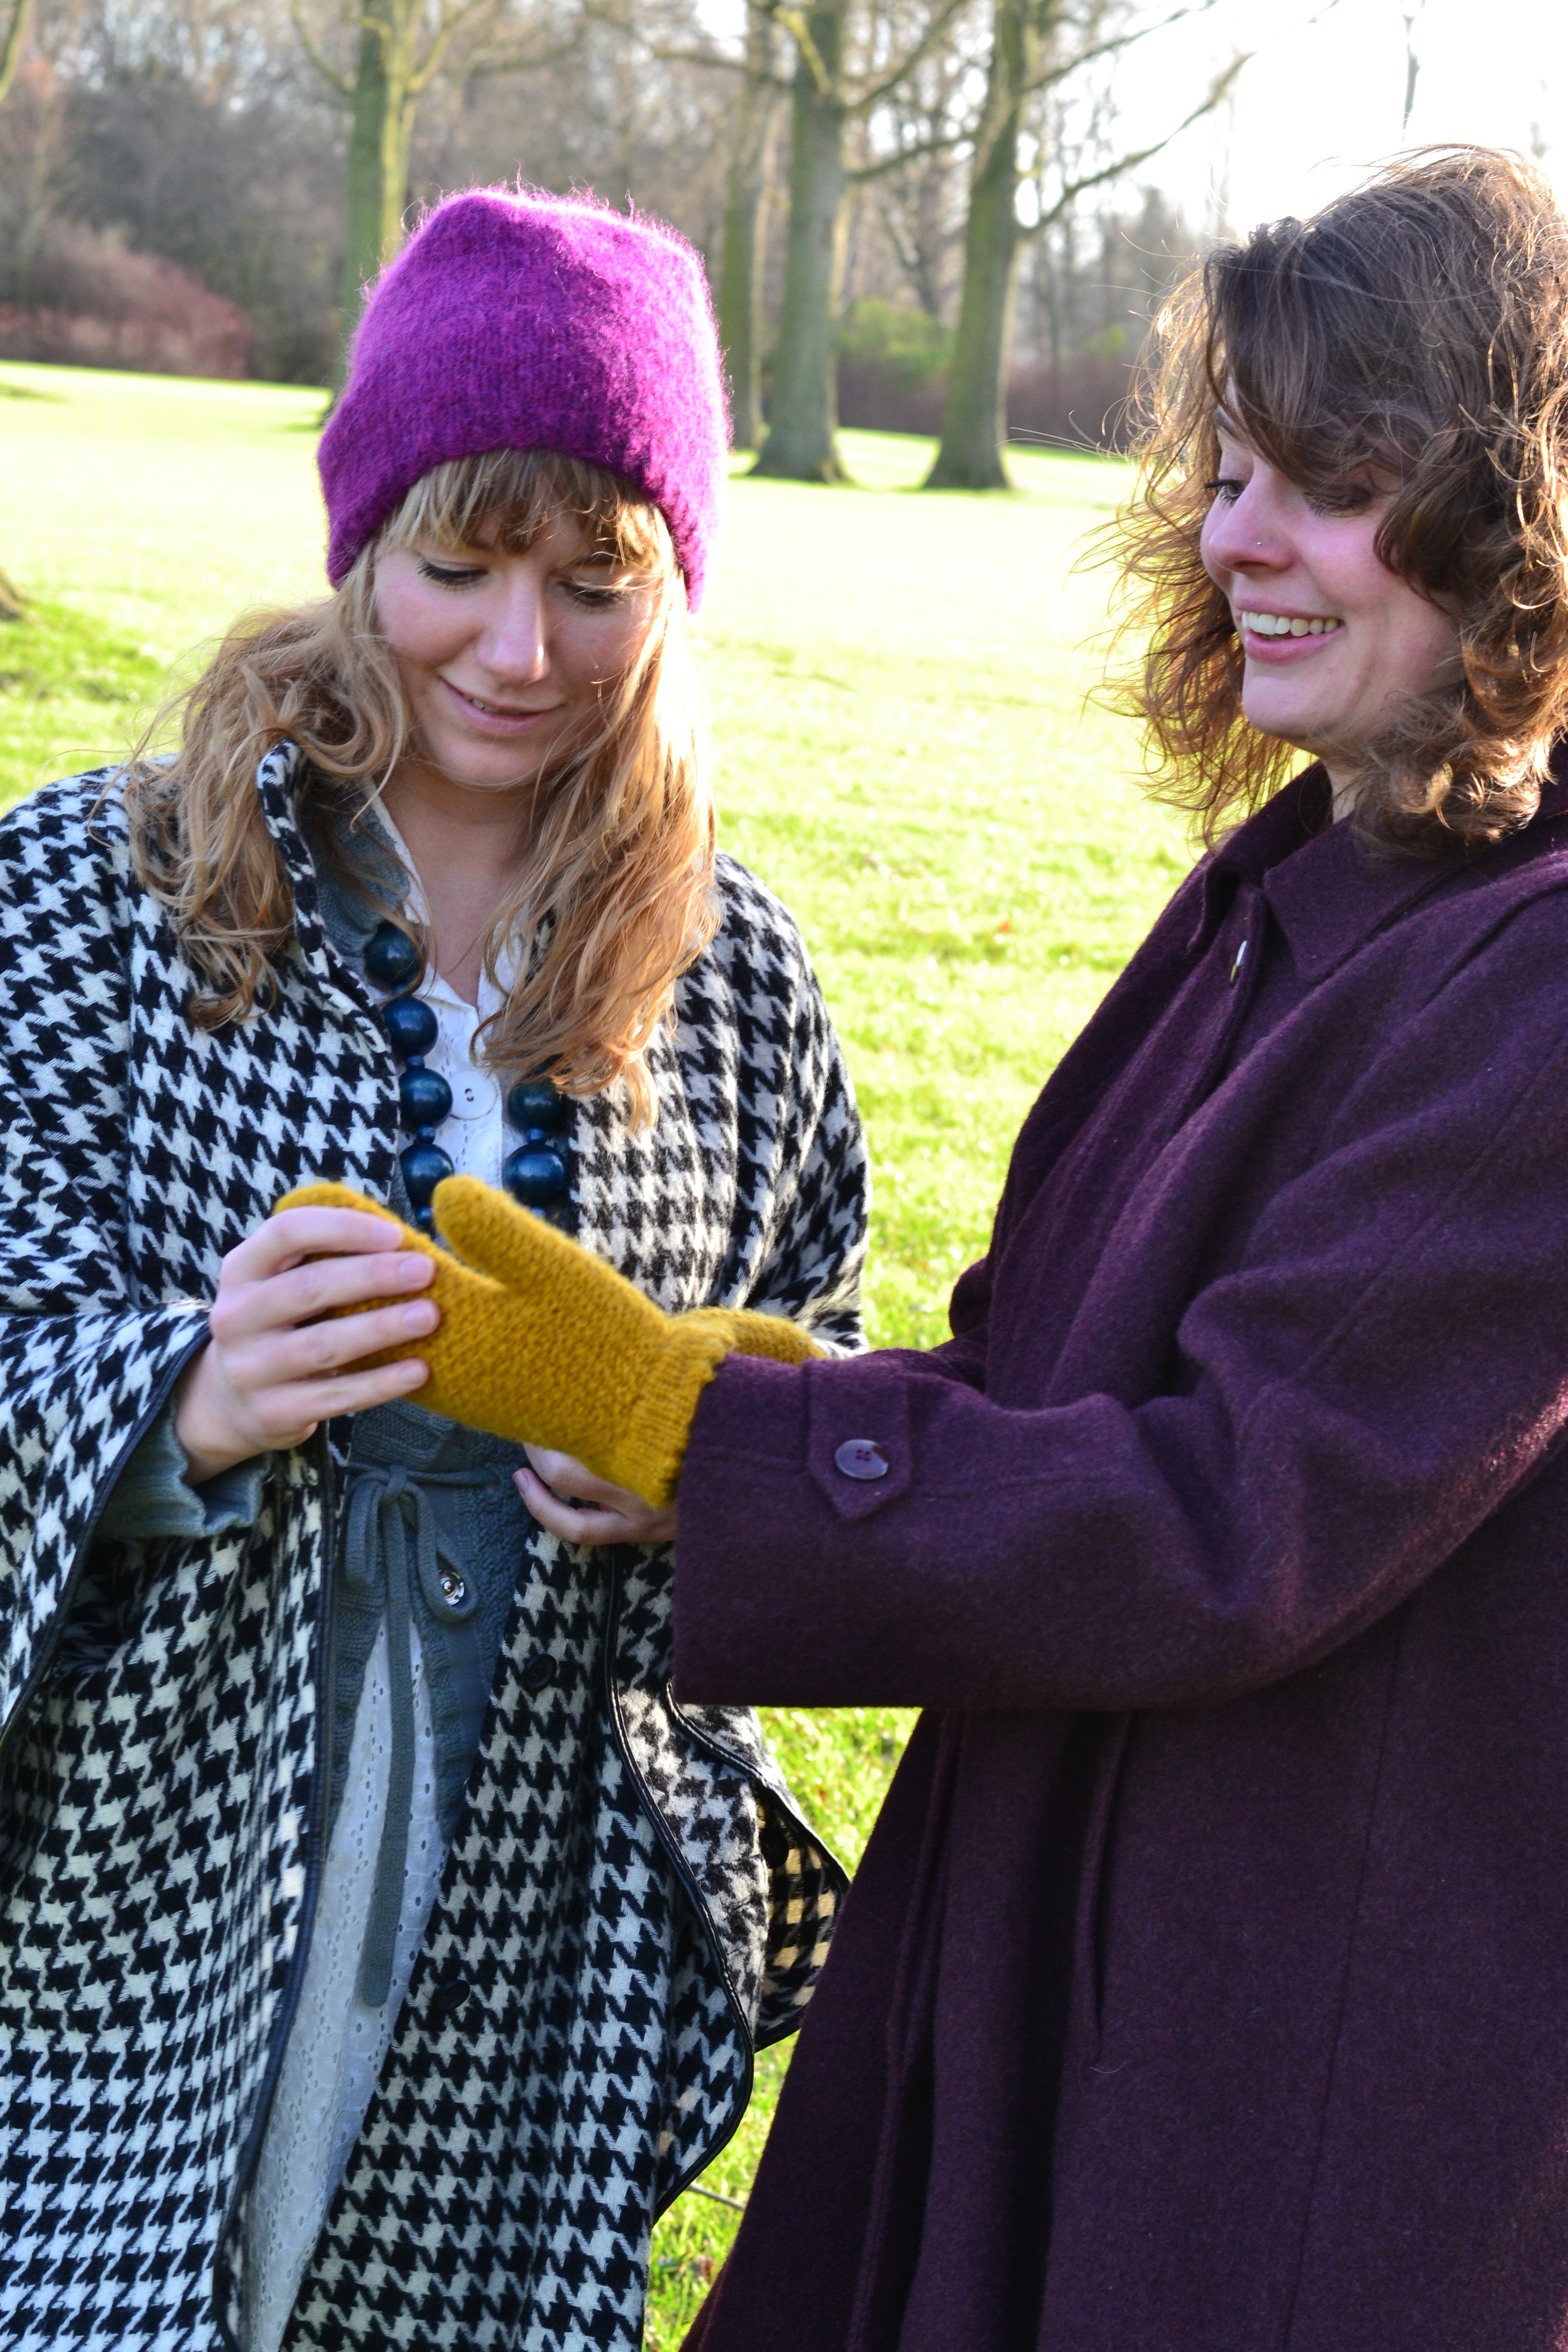
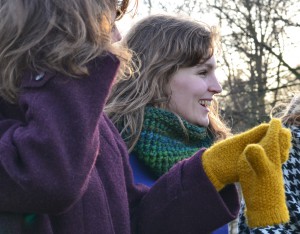
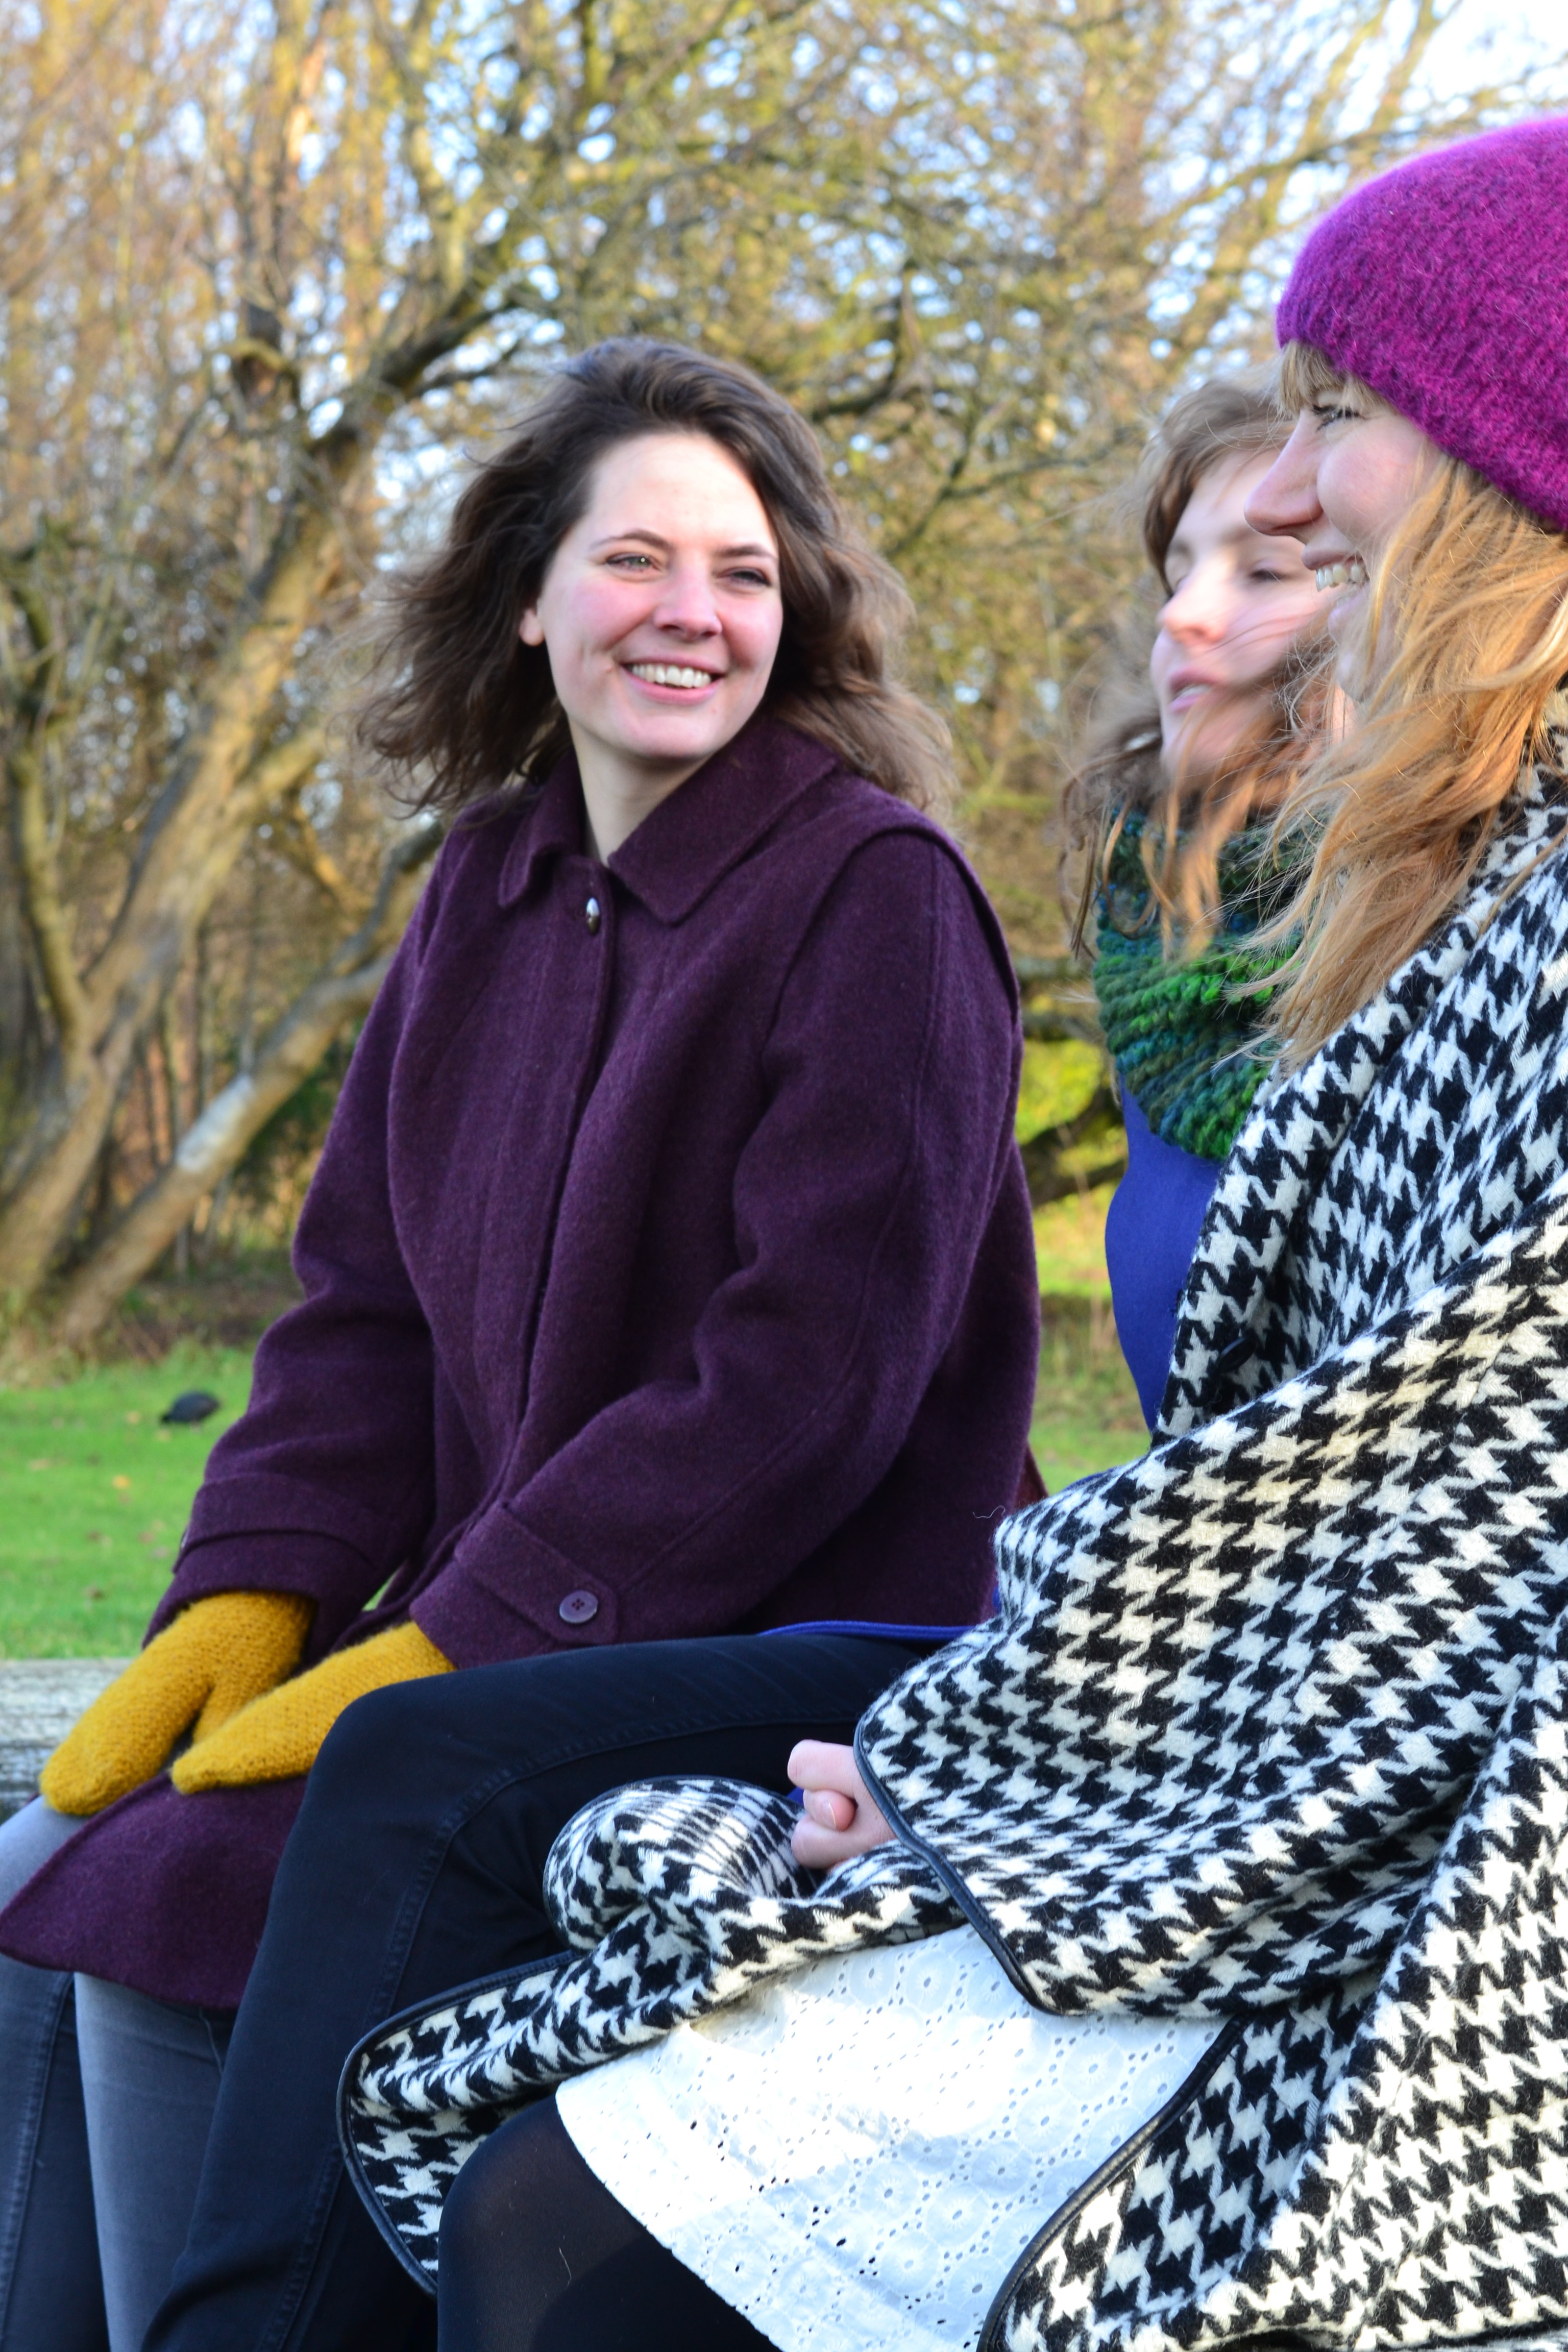
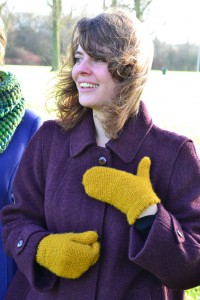
I have knit Grolsch mittens with Icelandic wool and of course my own Jingle Bell Rock mittens, both in fair isle. They are wonderfully cozy and warm, but at the same time a bit chunky. These yellow mittens I’ve knitted a while ago, they are more elegant. The subtle moss stitch, combined with the scalloped edge of the cuff, makes this pair ideally suited for a lady.
Used techniques: provisional cast-on, knit, purl, moss stitch, decrease, yarn over, kitchener stitch, backwards loop cast on, pick up stitches.
Pattern
Cuff
Using a provisonal cast-on, cast on 34 stitches. Use a piece of scrap yarn in a contrasting color and a small crochet hook. Start with a slip knot on your crochet hook and using a 3.5mm needle wrap the yarn around your needle. Crochet a chain stitch and wrap the yarn around your needle again. Repeat this routine untill you have 34 stitches on your knitting needle.
1-9: Knit 9 rows.
10: Repeat * knit two stitches together, yarn over. *
11-19: Knit 9 rows.
20: Fold your work and pull out the scrap yarn from the provisional stitches one stitch at a time. Knit every stitch together with the opposite stitch on the knitting needle. You should see a scalloped edge on your cuff.
Mitten
Using a 2.75mm needles
Decrease one stitch in the next row; there should be 33 stitches on your needle. (This part of the pattern requires an uneven number of stitches.)
21-42: Knit 22 rows in moss stitch:
Even rows : * knit, purl *
Uneven rows: * purl, knit *
43: Put 7 stitches onto a safety pin or a piece of scrap yarn. This is where you’ll knit the thumb. (This instruction is for the right hand mitten. For the left hand mitten, first knit 9 stitches in moss stitch and then put aside the 7 stitches.) Cast on 7 stitches on the right hand knitting needle, using backwards loop cast on. Knit in moss stitch until the end of the row.
44-75: Knit 32 rows in moss stitch.
Start decreasing.
76: Knit 14 stitches in moss stitch, knit two stitches together, place a stitch marker, knit two stitches together, knit 13 stitches in moss stitch, knit two stitches together and place a stitch marker. There will be 14 stitches between both stitch makers.
77-81: Repeat * move stitch marker, knit two stitches together, knit in moss stitch and stop two stitches before stitch marker, knit two stitches together *
You’ll end up with a total of 10 stitches. Make sure there are 5 stitches on both your needles. Cut the yarn and close the top of your mitten using a kitchener stitch.
Thumb
1: Put the stitches from the safety pin onto your needle and knit these stitches with moss stitch. Pick up 11 stitches around the thumb hole. (You pick up more stitches then you’ll need, in order to prevent gaps.)
2: Knit 6 stitches in moss stitch, knit two stitches together (2x; purl one and knit the other), knit five stitches in moss stitch and knit two stitches together. There are 15 stitches on your needle.
3-24: Knit in moss stitch.
Start decreasing.
25: Knit 5 stitches in moss stitch, knit two stitches together, place stitch marker, knit two stitches together, knit 4 stitches, knit two stitches together and place stitch marker. There are 6 stitches between the stitch markers.
26: Repeat * move stitch marker, knit two stitches together, knit in moss stitch and stop two stitches before stitch marker and knit two stitches together *
You’ll end up with a total of 8 stitches. Make sure there are 4 stitches on both knitting needles. Cut the yarn and close the thumb using the kitchener stitch.
Tie off all ends.
This pattern can also be found on Ravelry.
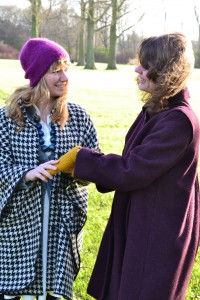
Models: Hermke (and Myrthe and Nina)